Showing posts with label quilting: completed. Show all posts

Saturday, October 05, 2013

Iron Caddy

Iron Caddy

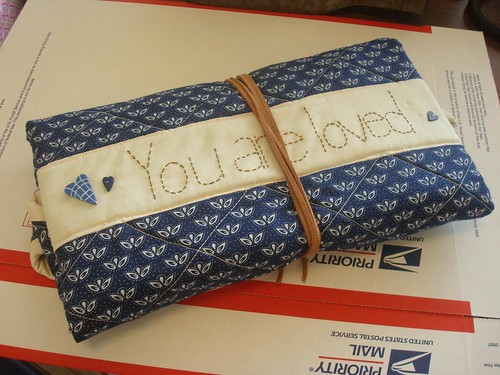
You may remember awhile back when I made a drawstring bag to carry my handstitching supplies. And those of you with really good memories may recall that I wanted to make an iron caddy. Well part of what was holding me up on the iron caddy was choosing a fabric. Because you can use it as a pressing pad, it's important to use a single piece of fabric (no seams to cause wrinkles and bumps). And I was suffering from perfectionism. Especially once I completed the drawstring bag and realized that I would really prefer it if they matched.

Saturday, June 29, 2013

Space Baby Quilt Completed!

Space Baby Quilt

Life has exploded these last two months and I've fallen behind on my blogging. Consider this my first offering in catching up. The space baby quilt is happily ensconced in its new home!

In my last post, it was quilted. After that it was just a matter of burying threads, making up a pretty rainbow binding, attaching it, and tossing the quilt in the wash.

And I love it so much. I'm thrilled that it's off to meet its new owner and proud of how it turned out.

This photo shows the front.

Wednesday, February 20, 2013

Upgrade! A Pieced Drawstring Bag

Handsewing After

When I took my Handstitched class last year, I needed something to carry my supplies around in. You know, needlebook, thread, scissors, etc. So I grabbed what was handy, a ziploc bag and ran with that. Which works...unless you leave it our near a cat who enjoys eating plastic. Or want to put scissors in it. You know, crazy stuff.

So when Rachel linked to this drawstring bag tutorial, I knew I needed to make one. But with the holidays and trying to finish up my quilts which had deadlines, I just didn't get a chance.

Friday, December 07, 2012

Quiet Time Complete

Quiet Time

I finished Quiet Time at approximately 11pm the night before we left for the wedding (end result: 3 hours sleep; moral of the story: don't do that!). So, talk about squeaking by! Still, it was done and I got on the plane with a tote bag full of quilt and a happy heart.

Quiet Time

I ended up being about a 1/2 yard shy of the fabric I needed, so I ruffled around and found some more solid Kona in a neutral color. It's the putty colored strips along the top and bottom of the back. I have no idea what the fabric was intended for so...hopefully nothing important? It looks good here though, so it worked out well. : )

I quilted it in a squared off spiral from the center of the quilt. You can sort of see it in this picture.

I ended up having a bit of an emergency when, while laying the quilt out to show my in-laws (pre-gifting) I discovered that a couple of my seams had popped when I washed it. (Ack!). Thankfully our hotel offered complimentary sewing kits.

Quiet Time

I little bit of handstitching later and everything is (hopefully, cross your fingers!) secure and ready to go.

Wednesday, November 21, 2012

Quiet Time Gifted

Quilt!

We snuck a few minutes with the happy couple at the rehearsal to give them their quilt. (I'll do a separate wrap up post with more pictures of the quilt). We didn't have time to talk for long, but they seemed pleased with the quilt and I was happy to see it safely to them. ^_^

Friday, May 06, 2011

Celebrating 60

Mom's 60th Birthday Present


On Wednesday, my mom turned 60. This is one of those BIG numbers. The kind where you really should rent a hall, invite everyone you know, and throw a knock out surprise party. Except the 2300 miles between us makes that difficult. And expensive. And while I know there is nothing my mom would love more than a surprise visit from the hubby and I, I also know that we had already made plans to have a family vacation in August. So the visit was out.

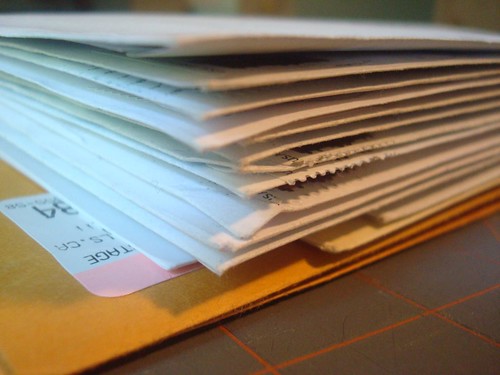
But I still wanted my mom to know how loved she is. So I thought. And I thought. And I thought. And I realized. The perfect way for her to know how loved she is, is for people to tell her. So I convinced my father to rifle through her address book and I conscripted the hubby for a late night Kinkos run. Where we found the perfect paper and made copy after copy of The Plan for Project Awesome. Each copy was a letter requesting that the receiver write my mom a letter telling her why she was special to them.

On each I wrote a little note and in every envelope I tucked a pre-addressed stamped envelope for them to return their contribution. In every one, I asked them to tag any others who might be interested. And then I waited.

I sent out 35 requests and received about 25 responses, though there were more letters than that as one enterprising friend managed to sneakily get letters from a whole group and ship them back to me.

Mom's 60th Birthday Present


These people rock. Every single one of them. For taking time out to sit and write a letter. To take the opportunity to tell my mom what she means to them NOW, while she is still kicking and awesome and not waiting for her (hopefully very far in the future) eulogy.

Quilter that I am, I couldn't stand to stuff all these precious letters in just any old envelope. They, and my mom, deserved better than that. So I made a...er, well, I'm not sure what exactly. A letter holding thingy to hold the letters.

Monday, March 21, 2011

Fabric Postcard Swap

Finished Fabric Postcards


In February, I participated in a fabric post card swap. The swap was a no stress swap which means you complete your cards before you sign up. That way should your experiment be an epic fail or life conspire to ambush you, you can bow out without feeling guilty. Since that is usually my big hang up with swaps, I was excited to participate. I'd never made fabric postcards before, but since the moderator suggested that this was a good way to experiment with things you had been wanting to try, I decided to test out a few ideas that had been on a slow burn in my brain for far too long.

Friday, May 28, 2010

Bloggers Quilt Festival--Blue Clear Sky


This post is part of the Bloggers Quilt Festival. Click on the image at the bottom of this post to see the other participating blogs

Blue Clear Sky


Last fall, I had just pulled my new craft room together. I was beginning work on a wonky rainbow squares quilt, just to get back in the swing of things, when a friend announced she was pregnant. She is an electrical engineer who works on small aircraft and was in the middle of getting her private pilots license, so I instantly knew just what the little one needed--a quilt with planes. Flickr lead me to Badskirt's freeform airplane block tutorial and I knew this quilt was meant to be. Nine months later my friend is on the verge of holding both her new daughter and this quilt. The quilt will arrive tomorrow (shhhh ; ) and the babe sometime next month. It's been killing me to keep radio silence on this project, so I will posting my process from initial concept through completion over the next week or two.* For this post, let's focus on the end result.

The front is shown above. (Modeled by my ever patient husband whom I rousted out of bed in the morning to serve as a quilt holder so I could take pictures in the morning light.)

The back is below. (See his bare feet? The poor man was still in his bathrobe. Don't get between this quilter and her photos!)
Blue Clear Sky


In my mind this is the perfect baby quilt--gender neutral, bright, cheerful, and cool enough to grow up with. I also snuck in a few color wheel lessons, so it's educational as well! ; ) And there are fuzzy, fleece clouds for the extra cuddly snuggly factor.


*The posts are now up! You can get the full scoop in the following posts:
Concept
Piecing
Quilting
Binding and Finishing

Sunday, April 18, 2010

Project Quilting--Challenge 1: Shoofly


Shoofly Completed


A couple of weeks ago Kim of Kim's Crafty Apple made a post on Twitter announcing that she was going to be starting "Project Quilting". As a fan of Project Runway, she was looking for something to similarly challenge and inspire her and she decided to start a quilting challenge.

Come inside to hear about the first challenge and get a behind the scenes look at my submission.

Thursday, February 25, 2010

Time for Tea


Another of my very first quilts ever, this one was a wall hanging for my mom. The pattern is from a Debbie Mumm book that my mother gifted me and that I tweaked.

Day 6


I added the hand embroidery and was pretty proud of my applique.

Day 6


I had no idea how to add tabs for a hanging rod, however, and my miters on the binding are dreadful. But at least those sins are only readily apparent from the back.

Day 6

Tuesday, February 23, 2010

Irises: Grandma's Quilt


The second quilt top that I ever put together was a Christmas gift for my grandmother. I had found the iris fabric in my local quilt shop, and knowing that they were her favorite flower, knew I had to make her a quilt.

I had had grand plans with all sorts of other, coordinating fabrics, but they were all much too busy. Instead I went with simple and serene and set the irises against white (my grandmother's favorite color).

Day 6


The back was a beautiful "dog hair" pattern in purple, bordered in white.

Day 6


This was the very first thing I ever quilted, and it shows.

Day 6


But it was made with love, which is what really matters. Finished in 2003, my Grandma still keeps it on her chair and occasionally even uses it.

Day 6

Monday, October 12, 2009

Bloggers Quilt Festival--My First Quilt


This post is part of the Bloggers Quilt Festival. Click on the image to the right to see the other participating blogs

I have been sewing for as long as I can remember. Whether by hand or machine (or even carefully wound through those little plastic grids) stitching seemed to always be woven into the fabric of my life. At 11 I took a sewing class at (the now defunct) House of Fabrics with my best friend. We made draw string bags and pajamas and an apron. I remember practicing our stitch work on patterns printed on paper and being appalled that we would sew paper.

It was in House of Fabrics that I first saw quilts. Oh, how I wanted to quilt. But I was intimidated, I didn't understand how it all went together, and other interests carried me away. I was in college when I discovered that our on campus "Craft Center" (which taught all sorts of amazing handcrafts like woodworking and stained glass and weaving) offered quilting classes. At the encouragement of my then boyfriend (now hubby) I took a deep breath and plunked down my money. For the next 10 weeks or so, I spent one night a week ironing, cutting, and piecing. It was magic. Our instructor was a lovely lady, full of practical advice and my class was primarily made up of other women in the sciences, looking for an outlet.

My First Quilt

By Christmas, I had finished my first quilt top and back, but it would be the second quilt I would actually quilt (I decided to make a gift for my Grandma first). The front was a "crazy quilt" stack n'whack; the back, large pieced squares. (It took me a long time to understand why anyone would want just a plain back on a quilt.)

My First Quilt--Back

For the quilting, I carefully chalked out three large hearts connected with sharp, geometric lines. The border was filled with diamond shapes. Looking back, it seems pretty fancy for one of my first quilts! At the time it seemed too simple even as it was and I wondered if I would ever be any good. And sure, it isn't perfect, but it's perfectly functional.

My First Quilt--Fabric Detail

Seven years later, as I jump back into quilting after a four year hiatus, looking back on that first quilt I can see how much I have grown. How much more forgiving of myself I am. How much more patient I am with the process and the mistakes. I am even looking at my current work in progress as a "learning experience", something I could not have embraced when I first began.
Related Posts Plugin for WordPress, Blogger...