
A couple of weeks ago Kim of Kim's Crafty Apple made a post on Twitter announcing that she was going to be starting "Project Quilting". As a fan of Project Runway, she was looking for something to similarly challenge and inspire her and she decided to start a quilting challenge.
Come inside to hear about the first challenge and get a behind the scenes look at my submission.
The first challenge was posted last Sunday and we were given one week to design and create our pieces. This was already way out of my comfort zone, I have never completed a quilt in less than several months time. But I was looking for a way to practice new quilting techniques and skills so this seemed like the perfect avenue. I'm at the point of quilting a lap sized quilt and terrified to start--I am so worried I am going to "ruin" it with rookie quilting mistakes. So a few small projects to get my feet wet sounded like just what the doctor ordered.
The challenge guidelines were simple:
1. Use the shoofly block as your inspiration.
2. Maximum size is 36" X 48"
3. Maximum budget of $10 (not including stash fabrics, batting, or thread)
4. You must use at least one striped fabric.
I sat down Sunday night and started sketching. It took me until Wednesday to settle on a concept because I added an additional rule for myself. I wanted this to be something I would actually use and enjoy. I've done one too many class projects that wind up shoved in the back of a closet somewhere.
My thought process for the final design went something like this:
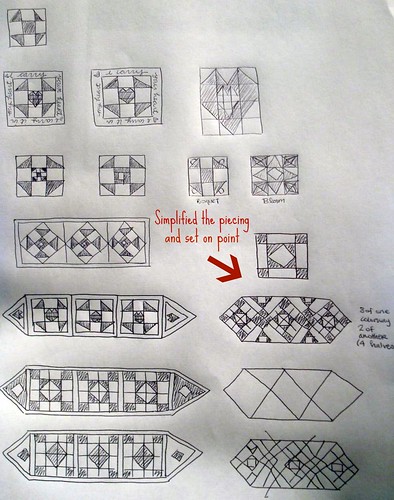
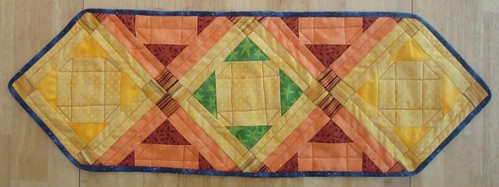
If you take four shoofly blocks and put them together, you create a new center design. If you pull that design out by itself and look at it, it's a rather neat shape. I dubbed it "Cathedral Window" but for all I know it already exists. (Click the image to go to Flickr and enlarge it)

From there I started playing with layouts, finally deciding to set the blocks on point in a table runner. I had been meaning to make a springy/summery table runner for our kitchen table so this seemed like as good of a time as any.
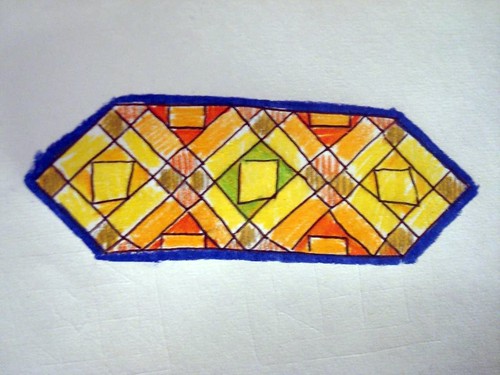
While I was sketching, I was also pulling out fabric, to see what stripes I had in my stash. I settled on some beautiful tonal stripes with a gold accent. I bought a whole pack of fat quarters many years ago, but had never found the perfect project for them. It didn't hurt as much to cut into them as I thought it might.
Based on that, I colored up a quick mock up.
And began cutting, sewing, and piecing.
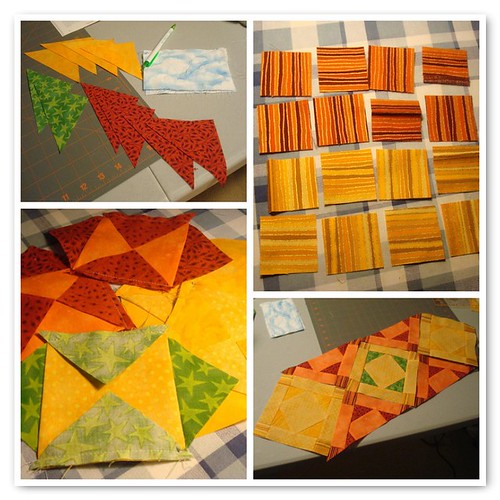
After picking up some deliciously red thread from the quilt shop yesterday. I took a deep breath and started quilting. And binding.
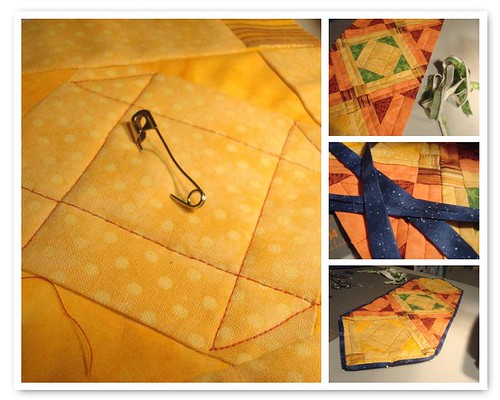
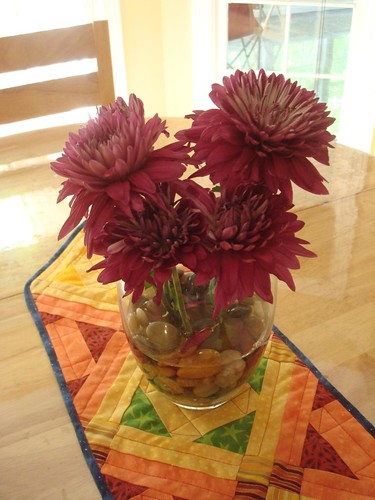
And before I knew it? I had a fully finished table runner. And much glee. : )
I'm pretty tickled that this actually looks like the sketch I colored up. Usually I end up changing things (or several things) halfway through.
Lessons Learned
1. How to bury the ends of machine quilting so I don't have to backstitch or always run off edges! It may sound simple but I am SO proud of this.
2. How to use double bias tape (my own) to bind a quilt. Even going around corners!
3. Contrast is better! All three yellow blocks were going to be the same, but I didn't have enough of the dark yellow, so I used the green in the middle block. I'm so glad I did because it really *pops*. This emboldened me to pick red thread, instead of trying to blend in with the colors of the block. I love the effect. The shoofly quilting outlines remind me vaguely of redwork.
4. It is possible to finish a project in a week!
Overall I found the project to be incredibly inspirational and motivational. I came up with a dozen other ideas (at least two of which I have hung onto and want to pursue) while working on this table runner. I might choose to work on something even smaller for the next project though, while finishing in a week was certainly doable, it left little time for my other commitments.
If you want to see how other people interpreted the challenge, you can check out the other entries in the flickr pool.
WOW! Thanks for documenting your journey :) that's exactly what I'm hoping to happen with these challenges!
ReplyDeleteCan't wait to see what you come up with next time!
~Kim