Showing posts with label helpful things. Show all posts

Thursday, February 06, 2014

How I Use My Bullet Journal

Bullet Journal

I've been using my Bullet Journal for almost 2 months now. Since everyone is going to use one of these a little differently, I thought I'd share what's working for me.

No Monthly Calendar
Yes, the little video says to create a list version of a calendar. But I just cannot do it. I like that my digital calendars stack events, show overlap, are automatically color coded, and send reminders.. And that they talk to each other. (I have a no longer supported program that syncs Google calendar with Microsoft Outlook.) That part of my system was already working, so I'm not changing it. However...

Yearly Calendar
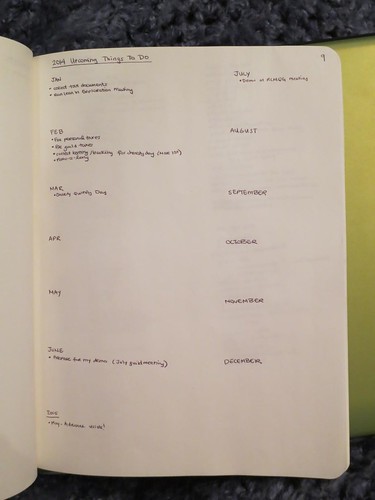
...I do love my yearly calendar page. (Shown up top, at the beginning of the year, it has many more things on it now.) This is where I write events that are a few months out. Yes, I can check my digital calendar, but that doesn't help me for events that don't have a set date yet. So this is where I log upcoming but still nebulous events. I also log recurring things that I need to remember to do (like taxes or termite inspections(, and any big events (even if they have a date). This helps me know how much is going on in any given month so that I don't accidentally over schedule.

My yearly calendar has a heading for each month and under it I bullet the upcoming events. Under that I have a single list for 2015. There are far fewer of those events, so they need less space.

Comprehensive To Do Lists
I dedicate one page to home and one to work. My home list has subheadings like "Being a Responsible Adult" or "Things to Make" or whatever else makes sense for that grouping. I usually have one for each club/group I'm associated with, one for fun stuff, etc. At work, I organize by projects and usually have a category for general administrative stuff too.

I don't worry about adding tiny things to this list. You know stuff that comes up and you do immediately and it's done? I don't bother. But anything I need to track or do not *rightthisinstant* goes on the list. This is the place that all those "oh! I need to do X" thoughts go. This is where my action items from meetings go. This where the "you know I'd like to do x" items go.

Then I have a daily to do list. This is grouped by day and is created by referencing the home/work lists and picking which items need to be done /I would like to do that day. I add smaller items that come up through the day as well. So "pick up library books on the way home"? If I think of it at work and will do it that evening? Daily List. If I think of it over the weekend and know I will need to do it later that week? Home List.

I check things off as I do them. Once the page is full and/or I am having a hard time seeing what is unchecked because of all the checked off stuff...I start a new page. I have some post it flags that I used to mark work, home, and daily lists. When I start a new page, I move the flag to the new spot.

Meeting Notes
This has been brilliant. I am a note taker to the core, but I've never had a good spot for non-work related notes. If I took them on paper, I never knew what to do with them after. So I generally took them on my phone. But I'm a slow thumb typist and then everyone thinks you are being rude and antisocial. So! This is much better. I can easily reference them later. Because many of my meetings are monthly, if I don't use the whole page, I just take next month's notes in the same spot.

Brainstorming
This is another thing that I used to do on scrap paper and then never know what to do with. Now, not only do I not lose it, but the index means it will be easy to find even months/years from now.

Lists
I keep a running list of restaurants I want to try (much better than my previous draft email method), but I could also use the method for books, websites, etc. In fact, I'm thinking of starting a general "recommendation" list for random recommendations from friends. The categories are all over the place, so unless they are restaurants, I think they will all go here.

Have you tried a bullet journal? Or a similar method? Does it work for you?

Saturday, May 15, 2010

Knock Off Wood


I really adore doing things for myself. The self sufficiency and self confidence you get from knowing how to handle things is unmatched and, for a worrier like me, the peace of mind to know you aren't being snowed by contractors is invaluable. There's only one problem...I never learned how to be handy. They don't teach woodworking or home ec in schools any more and, after a few disastrous home projects, my parent's contribution to construction projects consisted of signing checks and keeping me safely out of the contractor's way.

In other words, while I really want to be some sort of construction super star, I'm lucky I know my way around a power drill. I had pretty much resigned myself to buying premade furniture when I was pointed to Knock off Wood.

Knock-Off Wood


The site started as a way for DIYers to save a buck by showing them how to replicate pieces that were available at large box stores. She has since ventured into mash ups of several designs, writing up plans for reader requested pieces, and even some original ideas.

The most amazing thing though, to me, is seeing all the reader made pieces--especially the ones from total newbies. It gives me the confidence I need to know that I can do that.

First on my list? Planter boxes for our deck. I think I can figure those out for myself, I just needed the shot of confidence. Once I get my feet wet though, I'm eyeing things like the entry storage bench system and the flip top storage bench. You can search the full catalog here to find your own perfect pieces.

Monday, March 22, 2010

We Heart It


We Heart It


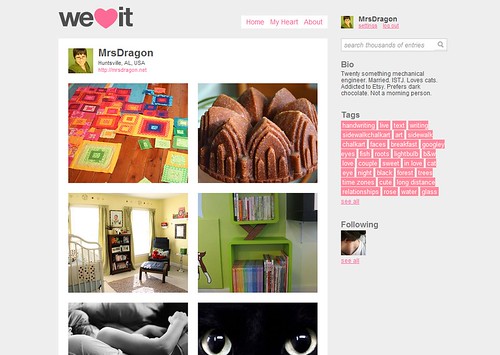
A friend of mine turned me onto a site called We Heart It. Essentially, it is a way to bookmark specific photos from any website. It is similar in concept to sites like Wists. However, while Wists serve to act as a wishlist, We Heart It is meant to act like an inspiration folder. If you've ever filled a scrapbook with bits torn out of magazine pages or painstakingly saved digital images to a folder on your hard drive--this tool was made for you. And the best part? It automatically saves the source link with the photo! No more long files names! No more forgetting where that awesome decor element came from!

My only complaint is that there is no way to group your collected images into sets. For instance, I would love to have a "house decor" folder, an "art" folder, a "quilting" folder, etc. I get the feeling that the site is young, so some of these may be coming yet.

The site has a bookmarklet that you can install, or you can use an extension/addon to add the icon directly to your browser.

Chrome Extension
Firefox Addon

I run Chrome and both the bookmarklet and the extension work equally well. Unfortunately, this means that they share the same bug--I cannot add photos from Flickr if I have permission to add tags to them. Instead Flickr thinks I want to add notes. Sadly, this means I cannot add many of the beauties sitting in my Flickr favorites.

For general image storage while surfing the web though, it can't be beat. And, since you can follow other users, and add images from the general stream, it can work as a sort of crowd sourcing technique.

You can see the images I've hearted here.

Saturday, February 06, 2010

TweetMeme


Tonight, while catching up on my backlog of blog reading, I found a neat little twitter widget on Buns In My Oven's newest posts. So, of course, I had to go see what this was about. Turns out TweetMeme is a service that allows people to easily retweet posts with the click of a button. You can install it as a widget into your blog template (in your sidebar) or embed the code directly in emails, blog posts, web pages, and rss feeds.

I've opted to add it to my blog posts directly. The only problem? The widget apparently looks to the page the user is currently on. Meaning that if I embed the code in a particular post than from my main page, it displays the number of times my main page has been linked to. However, if I am on the page for the individual post, it displays the number of times that particular post has been linked to. My only other quibble? The script automatically includes @tweetmeme in the retweet instead of my twitter account. This is a setting I can change if I use the blogger widget, but then it must be embedded in the sidebar.

Overall, the utility (and good looks) of the widget are enough for me to make it a standard part of my posts. Hopefully, these details are things TweetMeme will work out in time.

What are your thoughts on twitter links (like TweetMeme) on blogs? Do they make you more likely to retweet? Annoy you by taking up space?

Sunday, April 06, 2008

All A'Twitter

After hearing about Twitter from several friends, I finally got the nudge I needed to sign up when another Etysian sent me an invite. For those of you who haven't seen Twitter before, it's sort of a cross between Instant Messaging and a blog. You can write posts from your computer, an Instant Message program, or your cell phone via text message. Each post must be under 140 characters and the basic premise is that they all answer the same question "What are you doing?". (Although that is a suggestion at best as people twitter about all manner of things.)

For those who have wanted to try out blogging, but have been hesitant of their own ability to generate content, Twitter offers a starting point. It is also a social networking tool, allowing you to connect with and respond to other users. For store owners, Twitter offers a quick way to say "New items in the shop!" without having to find a whole lot more to say about it.

It certainly has the chance to become plenty addictive. : ) I've added my Twitter to my sidebar on the right, showing my three most recent twitters.

Saturday, February 16, 2008

Qassia

The things I learn from Etsy, oh my. Today's newest lesson was about a website called Qassia.

From their FAQ:

What exactly is Qassia?

Qassia is a site to which you can add your websites. You can also add your knowledge, in the form of tidbits of information called "intel". The more intel you add, the better your sites will rank, the more backlinks you get, and the more money you make.

Qassia is 100 percent free, and does not require reciprocal links. You can get unlimited quality backlinks to your websites from Qassia.


Essentially, for everything you put into the site, you get "Quassia dollars" which boost your links in the ratings. Currently you have to be referred by someone else (clicking on the link above takes you to my page so you can sign up if you like).

I figure, it can't hurt. And when I get some more time, I'm going to try to go back and figure some of it out in a bit more detail. However, currently I am off to get ready for my big date tonight...we are celebrating our two year anniversary! ^_^

Tuesday, August 28, 2007

Photo Tips and Tricks

This post was supposed to be a part of the Etsy Bloggers Street Team Blog Carnival. However, I was out of town and didn't finish it in time. So I have (finally) finished it up and am posting it here for you all to enjoy. The topic was "Picture Perfect - tips for taking better pictures" and was being hosted by Humble Beads over at her blog.

Evolution

One thing I never really appreciated before I began my Etsy shop was just how much I would learn and about how many things. Marketing, pricing, photography--all things that are very, very essential to an online business and all things about which I was relatively ignorant. Through a lot of forum reading and trial and error my pictures have come a LONG way, but they are still far from perfect. So, based on what I have learned in the past year or so, here are my tips for better photos:

1. Lighting Great lighting makes all the difference in the world. Natural light is wonderful but often hard to come by (especially if you are a night owl!). Instead I created this nifty lightbox based on this article.

Setting Up the Craft Room-LightboxTips for lightboxes:
*Always use a bigger box than you think you need, you never know when your product line might expand or the perfect prop makes it a tight fit. If nothing else, leave enough room for you to comfortably shoot your pictures (meaning room for your hands to get it and enough height that you can see the preview screen on the back of your camera. I built my first one out of what I thought was a good sized box. After we moved, I pressed one of the bigger boxes into service as my new lightbox.

*Play around with different light bulbs/lamps and positionings. I have found that the photos I take with just my lightbox are darkish, BUT if I take the photos in my lightbox with the window open, they are gorgeous. Apparently, the overhead light in my craft room does not provide enough ambient light.

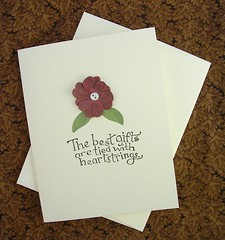
2. Backgrounds There are several methods to selecting backgrounds, but what works best for you depends (not surprisingly) on your product. My cards feature a single bright colored flower against ivory card stock. This means that colored backgrounds are not my friend unless I constantly change them to best match the flower color. (Otherwise, the flowers can look sickly or the ivory cardstock starts to pick up the background color). And frankly, that is just too much work for me to keep up with.

HeartstringsInstead, I try to find fairly neutral (I've found dark brown works really well for my cards) backgrounds that photograph well (many posterboards change colors or have a glare when photographed, so I switched to fabric, see left.). In a way, it becomes part of my store's "signature" that all photos are taken against the same background.

I've noticed that many metalsmiths (whose work is a neutral color) often use very bold, bright backgrounds to catch people's eye. That works incredibly well for their subject. However, many new jewelery artists try to mimic this same style for thier own pics--but if their work is, say, heavily beaded bracelets, the background color becomes a distraction and competes with their works.

Always think about your product and always take a few test photos of possible backgrounds as they often look very different on "film".

Artsy Shot3. Composition Despite that fact that we consider composition when creating our work, many people forget to pay attention to this when taking pictures. Even just taking a picture at an angle can turn a boring, everyday pictures, into a breathtaking, and eye-catching one.

4. Cropping Cropping your photos has a couple main advantages. First, it allows your photos to appear more uniform. I crop all my pictures so that my cards have approximately the same amount of background all the way around them. These leads to a more regular feel to my shop. Secondly, cropping your photos allows you to take your pictures from a distance but still get a nice, tight shot for your shop.

Cropping can also allow you to create a more interesting thumbnail. White space with a fleck of color is not enticing, but a large, interesting shot will make me click--even if I can't tell what it is. Jewelry makers especially can benefit from close up shots of beads or color to make their jewelry *pop* off the page. I used to think it was some sort of cardinal sin to cut off part of my main image. Then I realized how much more *interesting* the picture could be. The images below show two thumbnails for the same style of card. Which one would you be more likely to click on?

Summertime and the Livin's EasyWishing You Joy Card-Close Up

You don't need any sort of fancy software to do this. I do mine in MS Paint, which has got to be the cheesiest "graphics" program ever. If you run Windows, you have Paint, check under All Programs-->Accessories from your Start Menu.

5. Glare If you have ever tried to photograph buttons, magnets, glossy paintings, or just about anything but flat paper, you have struggled with this. My trick? Find various things to prop the item up against--even if they are just barely off the table. This gives the item a slight angle, which you can match with your camera, and causes the light to hit it differently.

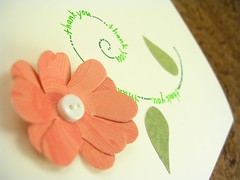
Blosoming Thank You Card6. Close Ups The key to good close-up pictures is the Macro setting on your camera. Most digital cameras have one--just look for the picture of the flower. When using the macro setting, get very close to your subject and wait for the image to steady in the frame (the camera has to decide which part is close and which part is far) before clicking. Remember to turn the Macro setting off when you move back to regular shots.

7. Exposure One of the most frustrating things I dealt with was building my brand new shiny lightbox and still having "gray" pictures. What was I doing wrong? I wasn't reading my camera's manual for one. : ) Exposure is somewhere in your camera's settings and ranges from .3 to 2.0, with .3 being the dullest and 2.0 the brightest. Essentially, this setting controls how hard the camera looks for light. If you are in a very bright environment, you want to ratchet it down. If you are in a dimly lit one, you want to go up.

This image shows a range of images taken one after the other, with different exposure settings. See the difference?

EXP Gradient

This should be adjusted whenever you notice that your images are looking a little grayed out.

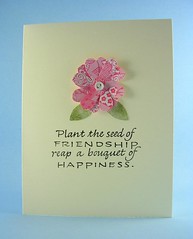
Plant the Seed of Friendship Note Card8. White balance Another common issue is having great pics--withyellowy or bluey whites. (The pic to the right shows a wonderful picture taken down several notches by a yellowy tinge to the card.) To correct this you can have your digitalcamera calibrate itself. On my camera, (A Nikon Cool Pix), I go to white balance and there is a place to have it measure. I hold the camera so that a small square is centered on something I know to be white (I keep printer paper handy for this). The camera snaps a picture and then scales until that box is pure white. It will then use this adjustment when taking pictures.

The important thing to remember about this is that is really needs to be set everytime you take pics. Lighting conditions change from day to day, so the calibration that worked yesterday isn't necessarily going to be the same one needed today. And nothing is more disappointing than spending several hours taking pics only to discover that they are ALL yellow. Ugh.

Friday, August 10, 2007

Life on the Internet

So tonight I spent some quality time with the internet. (Have you hugged your websites today?)

First, I updated my squidoo lens. A pretty good scrubbing up. I changed around the pictures and added a list of helpful sites for etsy sellers that you can vote on and add to! I'm pretty happy with it, check it out and let me know what you think. Or, if you are a squidoo member, you can "rank" my lens to show your opinion. Higher rankings help the page show up earlier in searches.

http://www.squidoo.com/mrsdragon

Secondly, I set up an account with http://indiepublic.com. I really like the small size and crafty vibe of the site. The layout reminds me of livejournal combined with myspace and is pretty easy to update and customize. My only complaint is that, like many of these sites, they are trying to be THE ONE PLACE for you to do everything. Unforunately, that's not how the internet works. I already have a flickr account, I don't want to re-upload my pictures on another site. I already have a blog, I don't want to copy and paste all my entries--I just managed to stop doing that!

The site is very new yet, so I'm hoping that they will provide easy integration with Flickr and a way to add RSS feeds to your site in the future. Right now I am planning on updating there from once a week to once a month, but we'll see how it goes. Perhaps I shall fall in love. ; )

The direct link to my page is:

http://www.indiepublic.com/profile/MrsDragon

Since it is such a small site, it is predominately made up of etsy sellers, which means that there are lots of familiar faces!

Finally, the Etsy Bloggers Street Team got some great news. Our blog carnival has been noticed by the admin over at http://blogcarnival.com (which is the site we run the carnival though) and they like it so much that we will be the featured carnival on Saturday, August 18th. We will be all over the homepage! Great advertising for the street team, our blogs, and Etsy! Woot!

Saturday, July 28, 2007

How to Prepare for the Fair

This post is a part of the Etsy Bloggers Street Team Blog Carnival. This week's topic is "preparing for a craft sale" and is being hosted by Alicia over at her Xanga.

I'm hardly an expert on craft shows, seeing as the one last week was only my second, but I have had *plenty* of experience with "boothing" (which is what we called outdoor cookie sales when I was in Girl Scouts). For five years (from age 13-18), I spent a few months every spring selling Girl Scout cookies. Door knocking, taking orders at school, and of course, sitting outside grocery stores (and one memorable weekend, in a mall).

Some things I learned from those experiences

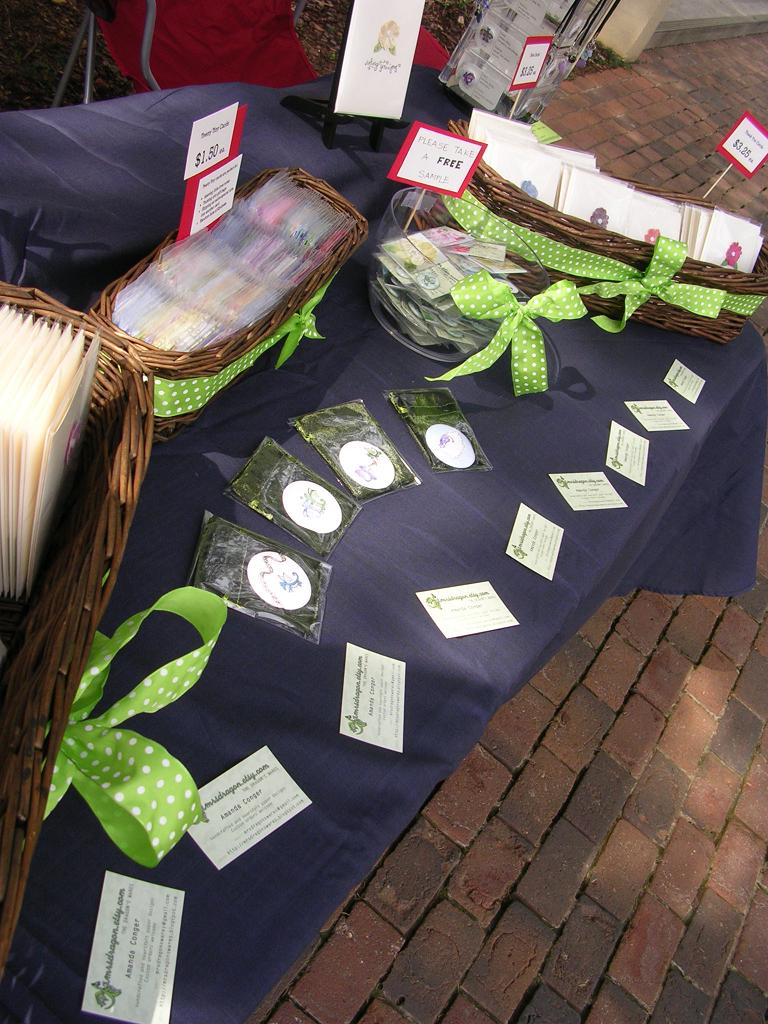
Table-Side View1. Round Numbers-- When I started selling cookies, they were $2.50 for a box. This was a magical number because people who initially only wanted one box, would have a five and so buy two. It was easy on them and easy on us. When the price jumped to $3/box all of those impulse buys went away!

Even if you price your items at $3/each considering offering some sort of combined discount-- two for $5 or four for $10. Often people will buy more to reach that "magic" discount. (Think of how supermarkets always label things as 2 for $5 or 5 for $10 and not $2/ea. Most people, myself included, will buy the number that the pricing suggests.)

Also, considering adding tax into your prices and rounding to the nearest even increment. If you sell items with higher prices, always set even increments-- $55 instead of $52.87. It makes it much easier to make change and seems more professional. For those who sell items at lower price points, you can still round to the nearest $0.25 or $0.50 increment.

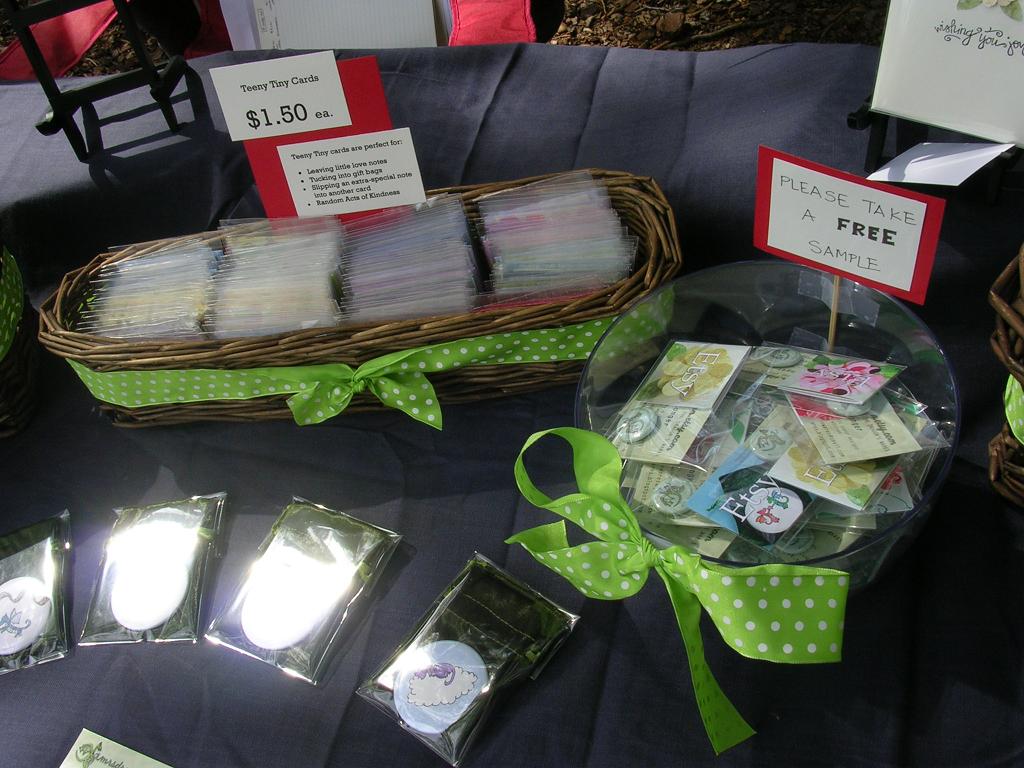
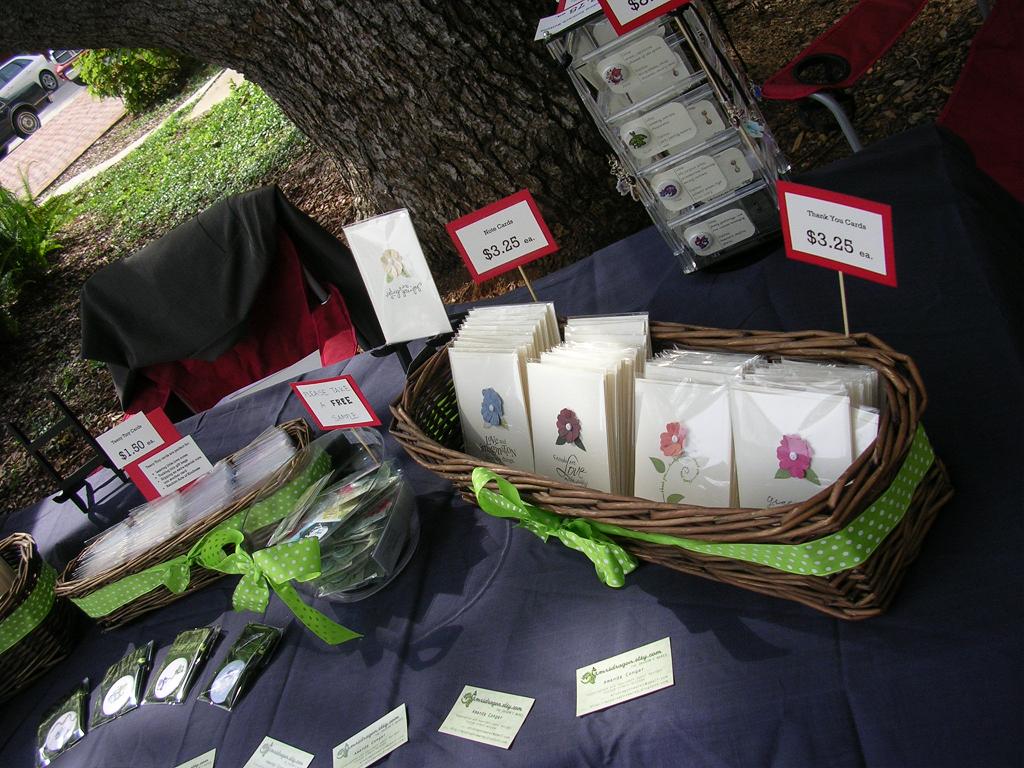
Table Center2. Samples-- When boothing cookies we found that people always wanted to stick with their tried and true. But if we opened a box of one of the new flavors and broke the cookies into pieces and offered "free samples" people would almost always add a box or two of the new flavor onto their standard order. Our troop would eat the whopping $3 for the samples in return for the extra sales.

There are two main factors at work there:

a) Reciprocity-- there is an unspoken social rule which says if I give you something, you should do something for me in return. Since in a sales environment, we are strangers and they will likely never see you again, they have to do that something now...so they buy or buy extra.

b) Fear of the unknown-- people don't want to plunk down their hard earned money for something they aren't sure they will LOVE. This is an area that is especially true for food vendors and bath and beauty sellers since the experiences are so visceral and taste varies from person to person.

Me3. Gauging Interest-- At the end of the day, the simple fact is that not everyone wants what you are selling. Some had no intention of buying anything, others do not need your product, or don't like your style. And that's okay! Just let those people move on by, you would be wasting your time (and most likely irritating them) anyway. (Think of how you feel when assaulted by people hawking one thing or another.)

The trick is separating out the various interest levels of might be customers. In my experience, they can be sorted as follows:

a) Just looking-- These buyers may or may not like what you have. But they do not like direct sales pitches and will leave if you start talking to them before they talk to you. Let THEM initiate conversation. Often they just need time to see what you have and if curious, they will start talking. Or even just hand you some merchandise to ring up.

b) Inquisitive-- These buyers may or may not want to buy from you, but they want to get to know you. They will ask you questions and make eye contact with you from the first. (In contrast to the "just looking"s who will most studiously NOT make eye contact). These are the people to chat up with which pieces are your favorites or a general description of your process. They often shop indie because of the handmade connection.

Dec 2 Craft Fair Table--Left Sidec) Go Getter-- These buyers know what they want. They may have stopped by your booth earlier with a promise to be back or they may simply have been looking for something like what you have. Conversation with them can range from terse, quick transactions to long, drawn out chats. With these buyers it is best to let them set the pace for the conversation but keep an ear out to know when they are done selecting merchandise or if they have any questions. Often they will pick out multiple things. Offering to hold things while they continue looking can keep them shopping and better allow other people to see your stuff!

As a general rule of thumb, I smile at everyone, say "hi" to the people who make eye contact, answer questions as they are asked, and offer commentary when I see people lingering.

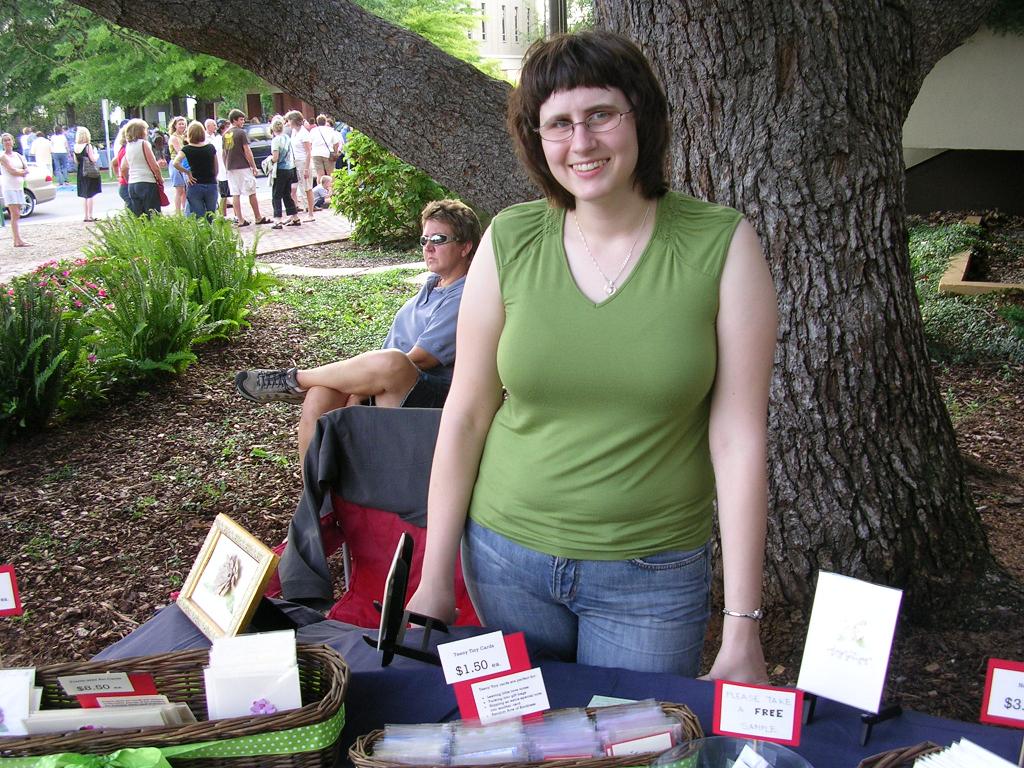
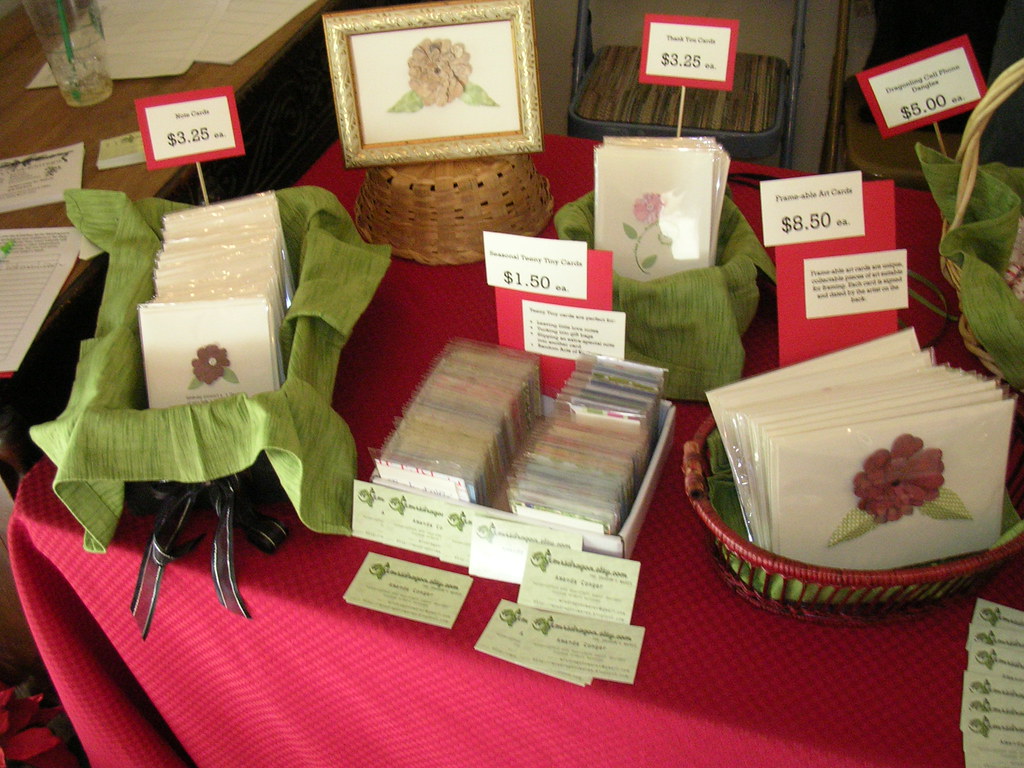
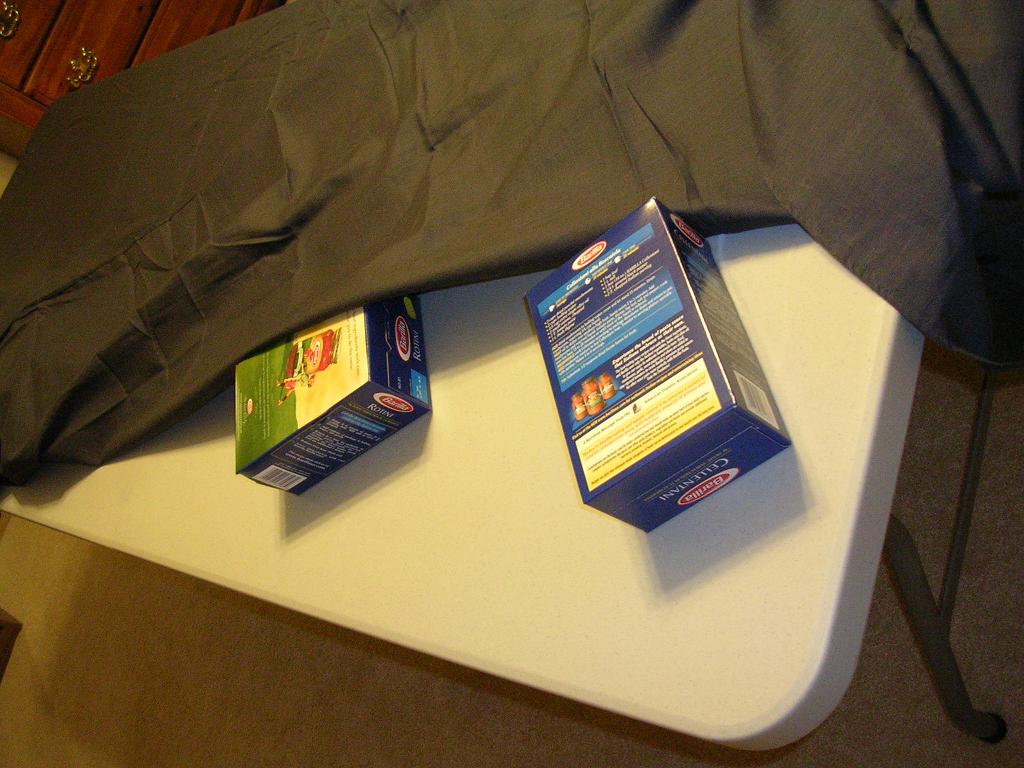
The Secret to a Great Table4. Think 3-D-- Table setups are at their best when they are three dimensional. Stick boxes under your table cloth for an easy way to "lift" merchandise in the back. Put prices UP where they are easily seen, even by people who are not looking at that particular item *righthissecond*. Lifting things up makes your table more dynamic and encourages people to come over and look. Along the same lines, use your understanding of color and composition to their fullest. (An easy cheat--think complimentary colors with different values, one dark and one light, or with high contrast.) You want your table to *pop* from a distance so people will come over and take a look.

5. Rehearse-- Do a dry run of your table set up the night before. I like to get everything set up, then pop the baskets/boxes of cards straight into the car. That way set up the next day is done in a jiffy. It also eliminates getting to the show and then discovering you don't have something crucial. You will be less harried AND one of the first ones set up. This translates to a confident, prepared seller calmly greeting the early-birds.

Right End6. Be prepared-- Once you get set up (especially for a half day show) do not plan on leaving your table. Bring everything you will need with you! My must have list includes:


  • Petty change--I find about $80 total to be enough. Get lots of singles and fives, a few tens, and coinage. If you have a coin jar at home, just bring that and only hit the bank up for the bills. At a show in late November, I only tracked bills, tossing all coinage into a bag of change and making change out of the same bag. At the end of the day I was only $0.25 off. Even if your prices are even, bring change because people will often pay with coins that create an overage. (Ex: their total is $3.50, they give you $3.60).

  • A pen and paper-- At this last show a customer told me about another local show. She gave me her email and the show's name. You never know what you may need to write down.

  • Business cards-- Heaps of 'em. Make sure they are on your table in easy to grab spots as well as handing them out to those that ask.

  • TAPE-- Scotch and packing. If you don't need it, someone else will.

  • A sheet for tracking what sold. Not only does it allow you to figure out your intake at the end of the day, but you can see what was popular and what to bring more of next time.

  • Sign-up sheet-- if you have an email list, then by all means, let people sign up for it!

  • Water and snacks-- 'nuff said. Hungry crafters are not happy sellers.

  • Sunblock (if you will be outside) and a jacket (regardless). My fair in November was indoors, but we were right by the door. I don't think I ever took my jacket off!

  • Whatever you need for your table display

  • Your usual stuff--keys, wallet, purse, lip balm, gum, etc.

Most importantly though, have a great time and stay positive; you never know when someone may come by who LOVES what you have to offer!

Wednesday, July 25, 2007

Work-Life-Etsy: Pick Any Two

Something that comes up again and again on the Etsy forums is how do people do it all? How do you work a full time job, treat your Etsy store professionally and still have a life?

Eternal Bliss--Close UpWell, I can't speak for everyone else, but here's what I do:

Work--just over 40 hours a week at a "9 to 5" (ha! do those exist any more?) job

Etsy--Update my etsy shop, blog, and flickr account nearly daily. Maintain the FAE street team and contribute to the VAST, EtsyGreetings, and EtsyBloggers street teams as time and interest dictate. Update a miscellany of other promotional sites: squidoo, myspace, stylefeeder, etc. Read the etsy forums for new tips and hints and look into/sign up for promising things. Make things and photograph them.

Life--Hang out with my husband and cuddle my kittens. Catch up with old friends online. Take copious amounts of photos to chronicle my life and upload the best to flickr.

OrnthAnd here's how I do it:

1. Prioritize. What MUST be done each day? What is nice if it gets done? What can be done once weekly?

For me, I make my shop, my blog, and my flickr (in that order) a daily top 3. Creating things and photographing things take top priority at least one weekend day. Surfing etsy for sellers to feature and items to add to my stylefeeder is a secondary priority, and that usually happens once every couple of weeks. Things like my squidoo, myspace, etc. wait until I'm either inspired or bored. Then I take a few hours and really do them right. This happens once every month or so, but spread over a variety of sites, each one may only get an overhaul once every few months.

Once you have your priorities set, stick to them (but not too much). I give myself a few "freebie" days every once in awhile to back away from the computer and go on a date with my husband or watch a movie. Nobody will die if you miss a blog post or your etsy shop has to miss a day, so make sure to take time off to enjoy life. At the same time, make sure those "freebie" days are the exception not the rule.

Blosoming Thank You Card2. Take Baby Steps

I did not spring fully formed from the head of Zeus with the knowledge of all things internet. I learn about new things constantly from other etsy sellers. Pick one or two sites at once to devote some time to and master before moving on. Realize that it will take patience before you start seeing results. I began this blog and my flickr account in late September. There were times when only a handful of people would look at my blog in a week. Some people may tell you that they had thousands of readers in a month or two. Realize that (while amazing for them) that may not happen for you.

Be prepared to put the effort in to learn how the site works. People know when you are a "member" and when you are just trying to hawk stuff. Each site has it's own culture and "vibe"; if you learn how that works, and what the social expectations are, you will see much greater returns on your time. You might even make some friends!

At the same time, be prepared to walk away. If you find that you a site's demographic or social customs aren't a good match for you, don't keep dumping time into a black hole.

Smootch!3. Streamline Your Processes

Most crafters already tend to create their items in small batches (if for no other reason than the crafty ADD that plauges many of us). However, there is more to streamlining your process than just the actual making of items.

Tools-- Having the right tools for the job can (and often does) make a WORLD of difference. For instance, a few weeks ago I mentioned my birthday tripod. When taking pictures this weekend, simply having that saved me literally 3 or 4 hours of labor. Pricey? Yep. And worth every penny. Often it's hard to know what will actually be worth the money, so if unsure, ask other crafters, check out reviews, or try to weasel your way into a "test drive" at the store.

Back to the Basics-- I recently decided to cut back from 5 pictures in every Etsy listing to 4. Why? Because the fifth picture was redundant. And by keeping in it (for no real reason other than to have a full five pictures) I was creating extra work for myself in taking 4-5 other pictures, cropping another picture, uploading another picture...

Look at what you do and what really needs to be done. Think about if it really matters or if it's adding value. In one of my courses in school they told us to ask "If the customer knew I was doing this, would they want to pay for it?". If the answer is no, then ask "Is it a necessary task?". If the answer to that is also no, then toss that step right out the window.

Also weigh in how long it takes. Sure, a customer may like a pretty bow, but would they still want it if they knew they were paying for 15 minutes of your time to get it "just so"?

Gratitude Card4. Recycle There are not enough hours in the day for me to do everything I want to do, so I try to make what I do do count. My squidoo lens contains an RSS feed of this blog and self-updating photos from my flickr pool. My myspace features an etsy-mini very prominently. Adding my items to stylefeeder as a way of advertising also adds flavor to my blog and myspace via a widget.

I used to manually mirror content from this blog to a livejournal community. Then I thought "WHY?", so I created an RSS Feed instead. It accomplishes the same purpose but I don't have to touch it. : )

5. Steal Time I bring my lunch to work each day and sit in our break room. That 45 min a day is my "me" time. I read my Time magazines to catch up on news, or sketch out new ideas for my shop. Last week, I folded my promo cards.

Dragonling Bookmark6. Don't Delay I am on email lists for my street teams and I have found that if I don't respond right away...I don't respond. So I try to spend some time each night reading the posts and responding. I also delete anything I'm not interested in and archive anything that I want to save for later at the same time, which helps my inbox to not become a bottomless landfill of emails.

7. Volunteer Not sure if I have time for something? I volunteer anyways. Yes, deadlines always stress me out (can we say glutton for punishment?) but it forces me to try new things and actually DO them in a timely manner. Use this sparingly though. I try not to sign up for more than one event or project per month, across all of my groups.

8. Cut Out Timewasters We all have them, things that we don't particularly enjoy, but get sucked into and before we know it, hours have passed. For me, I don't really watch TV. Sure I'll watch it with my husband, but I never turn it on just to watch because I know I'll never get back up. And since I am FAR too visually distractable to get anything done with the TV on, all that happens is I spend several hours plopped on the couch that I regret later.

Now, I don't mean to never take a break--just pick your breaks wisely to make sure that you are spending your break time doing something you actually enjoy.

(And just for the record, I may not watch TV, but I'm an internet junkie. : )
Related Posts Plugin for WordPress, Blogger...