Showing posts with label recipes: tips and tricks. Show all posts

Monday, January 30, 2012

Single Purpose Kitchen Gadgets I Love

Generally speaking I hate single purpose kitchen gadgets. They do nothing but take up precious cupboard space 99% of the time. Some, however, are worth every inch of space.

1. The cookie scoop.

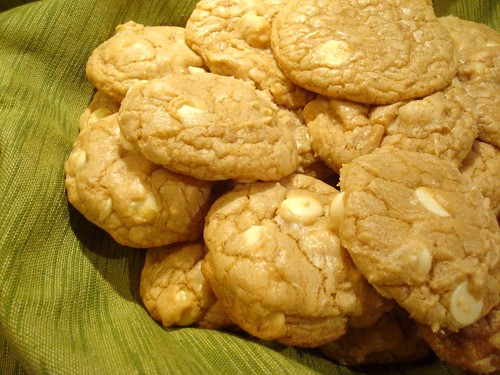
White Chocolate Macadamia Nut Cookies


Tired of dough sticking to spoons when you try to scoop it? Unevenly sized cookies where half burn and half are raw? Just plain want to make drop cookies faster? Cookie scoop! You can even make this a multi-purpose tool by using it for anything somewhat hefty that you need to scoop--fillings, gloppy salads, frostings.

Tuesday, November 30, 2010

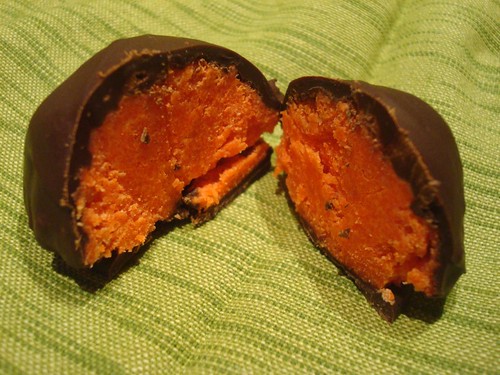
Cake Balls The Epic Story

Cake Balls!


One Saturday I got it into my head that I was going to make cupcakes, darn it! This happens every so often. I'm not a cake person, generally speaking, but every so often I am compelled to make cupcakes. I think it's something about how cute and little and happy they are. Perhaps it's the increased frosting to cake ratio. Regardless, I got it into my head. I had these visions of making two dozen cupcakes and then handing them out to friends around town. Of course, nothing is ever that easy.

Tuesday, May 04, 2010

How to Freeze Cookie Dough

Last fall I read a casual mention online about freezing cookie dough balls. It was like a great big lightbulb had gone on.

Why make 48 cookies at once when there are only two of us?

Why worry about racing home to get dough prepped when we want to take cookies to a party?

Why not have fresh, just out of the oven cookies ready a moment's notice?


Why not indeed.

Freezing Dough Balls


This has made a huge difference for us. Not only can you prep dough in advance of big events (hello Christmas baking) but you can also keep a variety of dough in the freezer ready to bake up as thank yous or for last minute company. (Or just for you. That's what we do with it most of the time). I'm sure there are a million methods for doing this, but this is what has worked for me. Feel free to change to work best for you!

Come inside for the 5 step method

Tuesday, April 13, 2010

Calorie Count


My Day in the Kitchen


One of the great things about baking from scratch is that you know exactly what goes in your food (no high fructose corn syrup, hurrah!) and you don't need a degree in chemistry to read the ingredients list. However, this can make it tough if you are trying to count calories or even just make educated calls on what a reasonable serving size is.

Calorie Count to the rescue! This site is addictivly easy to use. Just copy and paste your ingredients and the number of servings you expect. Less than an instant later you not only have a calorie count, but a nutrition label, just like you find on packaged goods. The site even conveniently leaves the recipe just below the label, making it easy to iterate if you want to experiment to see what various substitutions will do for you.

Those Red Berry Muffins from last week? 184 calories each. The seriously dreamy Ambrosia Macaroons? 88. The seemingly healthy Chocolate Chip Banana Cake (seen above, with friends)? 214. In a small slice.

Thursday, March 18, 2010

Pocket Pie Mold-- A Tutorial

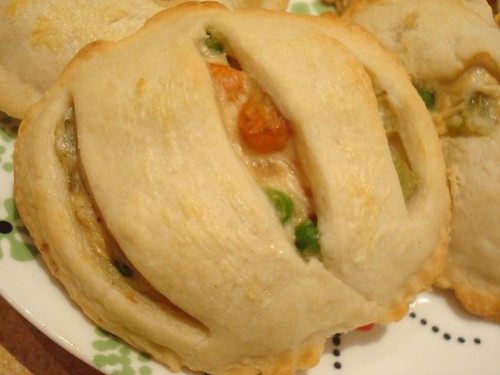
Pocket Pies


For our anniversary in February, my mother (knowing that I love to bake and that my hubby makes homemade pies) bought us Pocket Pie Molds from Williams Sonoma. I had never seen such a thing before and I believe my first reaction was more along the lines of "What in the heck is this thing?" than anything else. But with it being Pi Day and all, we simply had to try them out.

The basic principle is easy as pie (hah!) but it does take some practice to get it just so. We tried out the pumpkin, heart, and star shapes with both Chicken Pot Pie Filling (shown here) and Red Berry Pie Filling. This tutorial shows the pumpkin shape, but the same principles apply to all three. The only real difference we noticed was that the stars (due to the shape) end up being pretty much all dough at the points.

Come inside for picture perfect pocket pies.

Tuesday, February 16, 2010

Banana Bread Fail


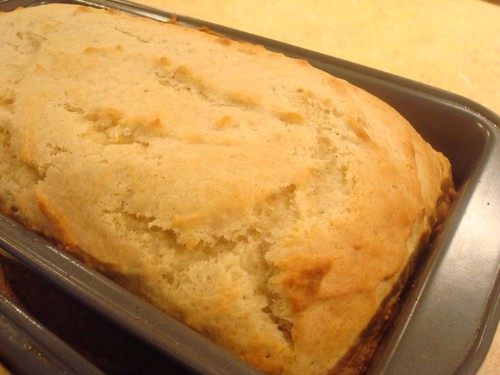
I grew up eating my mother's banana muffins (and helping her make them) and, since moving out on my own, they have been a standby recipe. Something I could easily make for a quick breakfast or on the go snack. So the other day when we had some nicely blackened bananas, I knew just what to do. Only the cupcake tins were dirty, and, feeling lazy, I decided that I would just bake it up in loaf pans instead. After all, it is banana bread, what could go wrong?

Everything started out well, the loaf came out of the oven looking beautiful:

Straight Out of The Oven


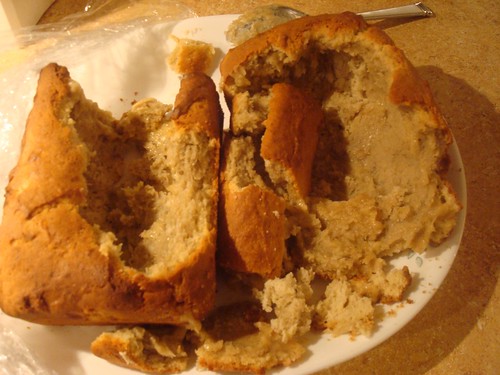
But when I came back after it cooled, I discovered that it had fallen, creating a large sinkhole in the middle of my beautiful creation. I wasn't too fussed over this (after all, I wanted tasty, not pretty) until the hubby and I cut into it and found that while there was a nicely cooked crust, the center was pure goo.

So, the hubby popped it back in the oven. Slightly thicker crust, and nicely browned top, but still goo on the interior.

So, we decided to give it one last go. We scooped out the goopey interiors...

Time for a Redo


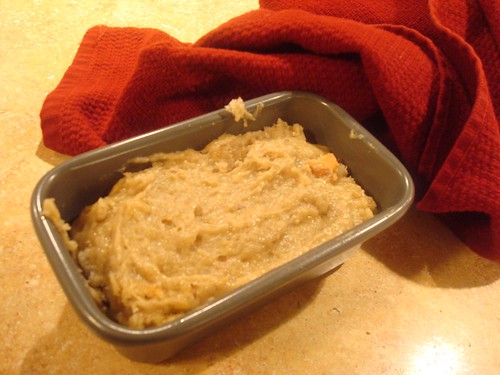
...and plopped them in a mini loaf pan. (It would have been brighter to put them in the muffin tins, but hey, hindsight is 20/20.)

Take 2


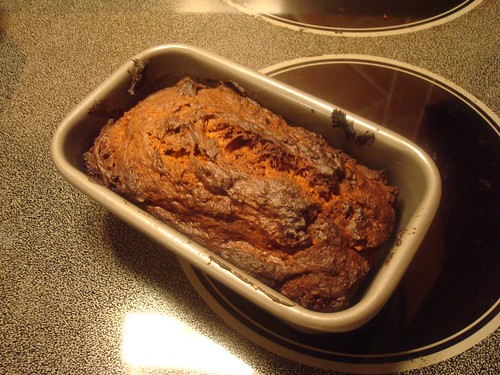
I threw that in the oven for what I intended to be 20 minutes and promptly forgot about it. So, two hours later, when the hubby inquired why it smelled like banana bread and had I taken it out of the oven? I dashed downstairs.

Baking Fail


Ooops.

The amazing thing? IT WAS STILL UNCOOKED IN THE VERY CENTER.

Clearly, there is a reason that this recipe was for banana muffins. Who knew?

Monday, February 08, 2010

Natural VS Dutch Processed Cocoa Powder or These are Not the Same

Not the Same


Back in September, I wanted to bake the hubby a birthday cake--an extra special awesome birthday cake for an extra special awesome husband. So, naturally, while I was shopping for ingredients and came upon a Dark Chocolate Cocoa powder, I figured it could do nothing but up the awesome factor.

Only the cake turned out to be a gooey mess.

I couldn't quite get it out of my head that the cocoa powder was somehow to blame. So, when I decided I wanted to make chocolate cupcakes a couple of weeks ago, I paid close attention to the recipe when it noted that the cocoa needed to be natural, not dutch processed.

Turns out there's a difference. In short, dutched processed goes in recipes with baking POWDER, and natural goes in recipes with baking SODA. Turns out my super awesome dark chocolate cocoa powder? A mix of natural and dutch processed. And the recipe? Called for baking soda.

So this time, we made sure to get the natural cocoa powder (as called for) and the cake was perfect. Fluffy and chocolaty and delicious.

Tuesday, December 22, 2009

Headache Free Holiday Baking--Tip 5--Finishing Touches

In this post I outlined some of my tips and tricks for simplifying holiday baking. Today, I'm going to talk about how we applied the fifth and final tip:

Finishing Touches

The goal of your packaging is mainly to preserve and protect your goodies until they can reach your recipients. However, if you are packaging up lots of them, you also want it to be simple, and, after putting all that effort into the baking, you want the packaging to look just as good!

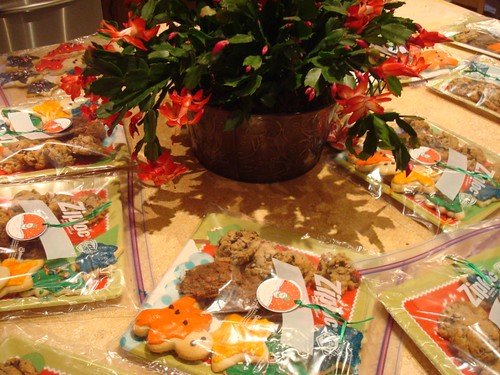
Tagged


Over the years my mom and I have tried:

Tins
Goodie Bags
Plates with saran wrap
Plates with Ziploc bags

The last is our standby and has been for years now. Seasonal tins are cute, but they can get pricey and they often hold far too many or far too few cookies. The shapes can make it difficult for cookies to fit and your recipient is left with yet another tin.

Goodie bags are cute, but for bulky cookies, they only hold a few--fine for gifting a single person, but they hold far too little for a family.

Plates with saran wrap look messy and the saran wrap has a tendency to come off the plate and allow the cookies to slop around.

Extra Plates


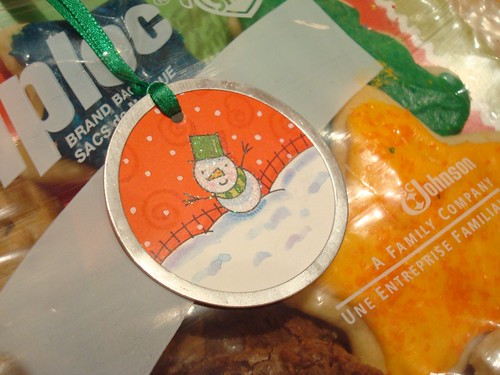
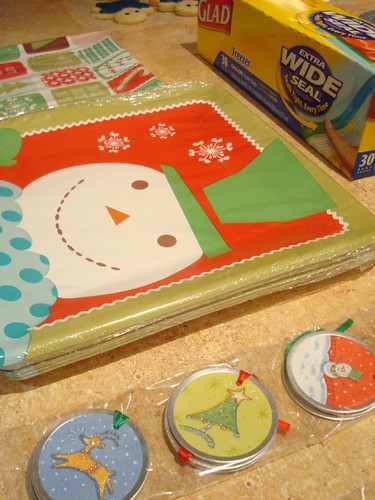
Gallon ziploc bags however, are the perfect size to fit a dinner plate. They are easy to open and close, tape tags to or write on. A dinner plate can be stuffed to the gills or more loosely filled, but can certainly hold enough for an entire family. If you want to get fancy you can use glass plates (which you can often pick up for a dollar, less than those seasonal tins!). As I mentioned previously, however, I've found that in the South, people tend to think that I am handing out my dishes and it makes them very uncomfortable. So I've switched to paper plates. I'm toying with the idea of something like this or this...a plate that tells people it's meant to be passed around and shared. (And thus, by extension...no I do not need it back, and no I am not handing out my dishes!)

Monday, December 21, 2009

Headache Free Holiday Baking--Tip 4--Time Travel

In this post I outlined some of my tips and tricks for simplifying holiday baking. Today, I'm going to talk about how we implemented tip 4:

Time Travel

By doing as much as possible in advance you can spread out the work. My favorite trick is one I learned this year...you can freeze cookie dough! This is one of those revelations that once you hear it, sounds completely obvious, but in all the time I've been baking, it had never occurred to me.
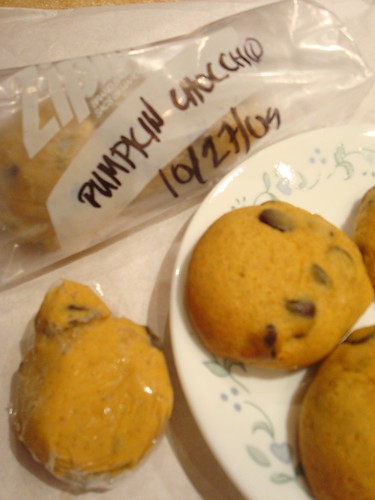
Brilliant


After some experimentation, here's the scoop:

You can freeze the dough either as balls (great for baking small batches of cookies on demand) or in "logs" (great for batch baking).

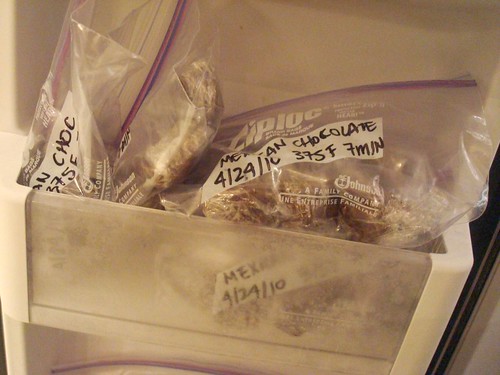
To create dough balls, drop your cookies onto a baking sheet and pop into the freezer for about 15 min. Once the dough sets up, toss into a ziploc bag, label, and freeze. Anytime you feel like cookies, preheat your oven to the proper temp for the type of cookie, throw your dough balls on a baking sheet and bake straight from frozen. Add a few min to the bake time. The hubby and I love this because we can bake 4-8 cookies at a time instead of overdosing on a single type of cookie trying to eat them all before they go bad.
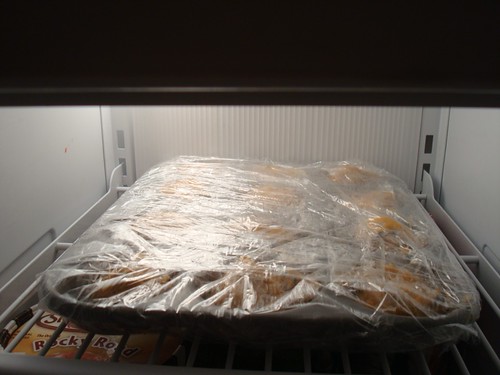
Chill


For batch baking, drop 12 teaspoons of dough onto a piece of saran wrap. Roll the saran wrap around the dough, place in a ziploc bag, label and freeze. When you want to make the cookies, let the dough defrost and then scoop onto your baking sheet and bake normally. This allows you to easily know how many cookies you are making (each log is one dozen) and also means you don't have to spend several hours rotating cookie sheets in and out of the freezer to get dough balls. (Especially if you have a small freezer like ours).

The cookies come out wonderfully. They don't taste of having ever been frozen, and it's an easy way to always have fresh, warm from the oven cookies on hand for guests. The one thing I did notice is that the oatmeal chocolate chip cookies didn't spread as much as they usually do. The photo on the left shows fresh dough that was baked, the right shows frozen dough that was dropped after freezing. The pumpkin cookies, however, didn't show that tendency, perhaps because the dough was smoother?
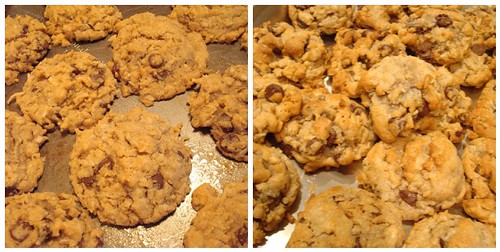
Fresh vs Frozen


Another huge plus to this method is that should find yourself with several occasions that you want to bake for, you can make up one huge batch of dough and then just bake as necessary. For instance, the oatmeal chocolate chip cookies for the holiday plates and for our housewarming party were all made from dough we made just after Thanksgiving.

But making up dough isn't the only thing you can do in advance, you can also:
  • Make frosting
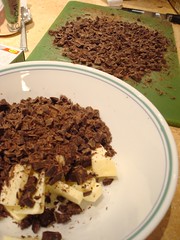
  • Prep ingredients (ex: chop chocolate or nuts)
  • Clear off the counters and wash the dishes (okay, so it's not as fun, but clear counters are a must when you are baking lots of cookies)

Sunday, December 20, 2009

Headache Free Holiday Baking--Tip 3--Make a Map

In this post I outlined some of my tips and tricks for simplifying holiday baking. Today, I'm going to show how we applied tip 3:

Make a Map

In addition to having made and frozen some dough in advance, we decided to spread our baking out over an entire weekend. Our schedule looked something like this:

Saturday
Phase I
  • Remove oatmeal chocolate chip cookie dough from freezer to let thaw
  • Make sugar cookie dough, divide into saran-wrap logs and toss in refrigerator
  • Make mint chocolate chip chocolate cookie dough

Sugar Cookies Chcolate and Buter Chocolate Chip Mint Cookie Dough

Phase II
  • Bake mint chocolate chip chocolate cookies
  • Bake oatmeal chocolate chip cookies
  • Start load of dishes
  • Make brownie mix, pour in pan, top with marshmallow fluff, swirl
Holiday Baking 1

Phase III
  • Put brownies in oven
  • Make and eat dinner
  • Start load of dishes
Phase IV
  • Run out to store for plates, tags, etc. (I recommend that you do this in advance!)
Plating Supplies

Phase V
  • Make brownie mix and cream cheese topping for cheater cheesecake brownies
  • Spoon into muffin tins
  • Bake cheater cheese cake brownies
  • Run load of dishes
Sunday
Phase I
  • Pull sugar cookie dough out of the fridge, one log at a time. Roll out and place on baking sheets.
  • Bake cookies as you continue to roll out dough (two people is a lifesaver here), set them out to cool as they come out of the oven
  • Take frosting out of the fridge (another thing easy to do a few days in advance)
  • Frost cookies, begining with the coolest cookies first.
  • Decorate

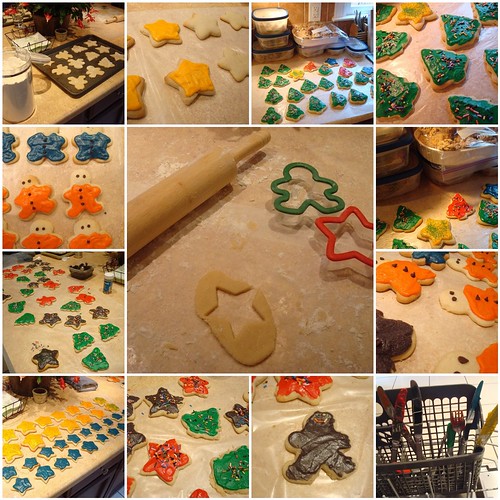
Sugar Cookies

Phase II
  • Set out paper plates
  • Plate cookies according to how many we have of each
  • Place inside ziplock bags
  • Write out tags, tape to bags
  • Run a load of dishes
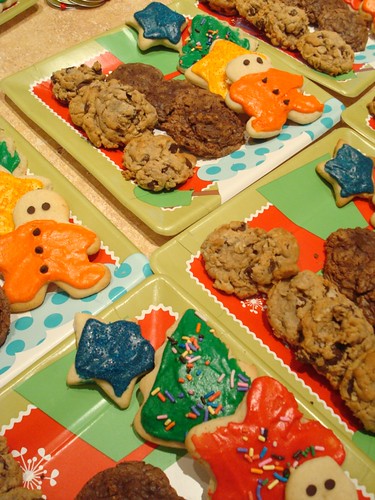
Bagged and Tagged

By the end of Sunday, we had all of our cookies made and frosted, the dishes done, had remembered to eat and still had our sanity intact. I call that quite successful. When making your game plan remember to factor in any other commitments and breaks. If your helper needs to leave early or join in late, schedule the more labor intensive things for when they will be there to help.

Saturday, December 19, 2009

Headache Free Holiday Baking--Tip 2--Choose Your Battles

In this post I outlined some of my tips and tricks for simplifying holiday baking. Today, I'm going to discuss how we applied tip two:

Choose Your Battles


Goodies


This year, I picked out the following recipes:

Challenging:
Frosted Sugar Cookies

Medium:
Mint Chocolate Chip Chocolate Cookies
Cheater Cheesecake Brownies

Easy:
Chocolate Chip Oatmeal Cookies

Most years, I just make the brownies straight from the box mix and call it done and they are my "Easy" option. However, since I still had approximately 4,563 lbs of cream cheese in the fridge, I decided to go with the cheater cheesecake brownies. And then the hubby had the idea to use cupcake tins and I...well I just couldn't resist.

All in all, that meant the brownies took considerably longer than I intended. However, since the dough for the oatmeal chocolate chip cookies was already made and in the freezer those moved from "Medium" to "Easy". So it all worked out in the end.

One consideration to keep in mind--if you are trying to get more variety on your plates but are out of time/space, you can always fill in between the cookies with colorful candy. I love to use mini candy canes for this since they are festive and the packaging is almost invisible, but you could use just about anything.

Friday, December 18, 2009

Headache Free Holiday Baking--Tip 1--Divide and Conquer

In yesterday's post, I discussed some of the tricks I've learned over the years to keep holiday baking fun and not overwhelming. In this series of posts, I'm going to show how we applied each of those tips to this year's baking extravaganza. First up, tip one:

Divide and Conquer

My baking buddy is my hubby. His mother taught him how to bake exotic things like pies and he won my college roomie over with homemade cookies when he first came over to study so his love of baking was secured before he ever met me. The important thing here is that he likes to bake. (Nothing will take the joy out of holiday baking faster than a Grinch in the kitchen so it's key that your buddy enjoy the process as much as you do.) We also have a lot of fun talking about anything and everything, which makes the time pass easily.

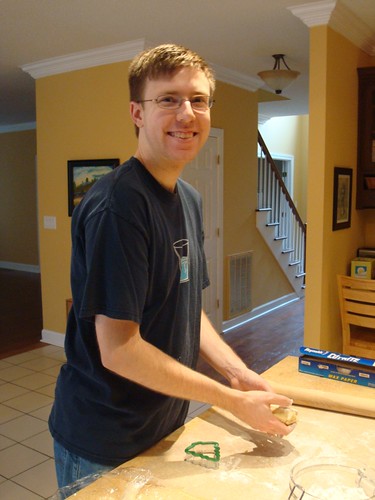
Finky Hubby


Having a second pair of hands lets you do things like:
  • Make up two batches of dough at once
  • Have one person prepping and one person putting things into/out of the oven
  • Get a head start on dishes while you are still baking (a must if you only have a few bowls or pans)
  • Negotiate out of (or at least share) the less fun tasks (like stirring chocolate ad infinitum)
Aside from all that, it's a great time to bond and talk and generally create some of that holiday spirit. : )

If you can't get two people in the kitchen at the same time, consider doing a cookie exchange, where you bake up X+1 dozen of your favorite treats and then swap with X other people. In the end, you only have to make one recipe, but you have a lovely assortment of cookies to gift. In most cookie exchanges, people also include the recipes and tips so you can make them again later / next year if you are so inclined.

Thursday, December 17, 2009

Headache Free Holiday Baking--Overview

Last weekend the hubby and I did our annual holiday baking. We enjoy baking and once a year we get to indulge in a weekend-long bake-a-thon and reap surprised thank yous in return. It's win-win for everyone involved. Lest you think you have to channel Martha Stewart in order to pull this off, I'm going to let you in on a few of the tricks we have picked up over the years.

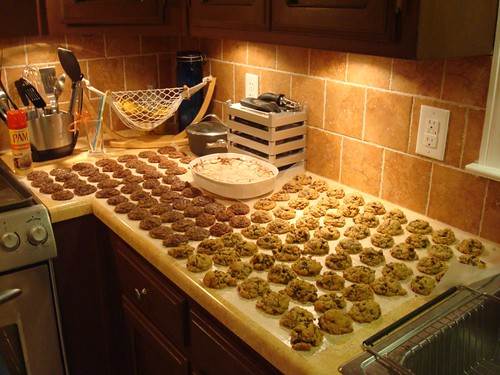
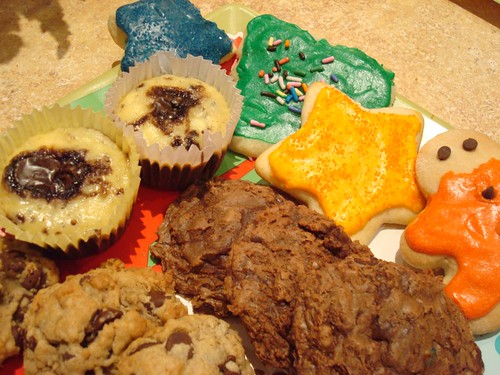
Full Plates


1. Divide and Conquer
Pick a buddy. I bake with my husband, but you could bake with a friend, child, neighbor...anyone who likes to bake and makes good company. Bonus points if their "old standbys" are recipes you've never made before. Two pairs of hands not only make the work go faster, but greatly simplifies the process of making up the next thing while pulling the first out of the oven every 6-9 minutes.

2. Choose Your Battles
Pick recipes with varying levels of difficultly. I usually do our recipe selection and I try to pick 1 that's time/labor intensive but worth it, a few recipes that take an average amount of time, and 1 that's either dead simple or a "cheat" (using box mixes).

3. Make a Map
Read all your recipes in advance and know if your dough needs to chill, approximately how long things need to bake for, what your oven temps need to be, etc. We start with anything that will need to chill or set. We'll plan for something that bakes longer in the middle of the madness, so we can stop for a meal. As much as possible, we start by baking things at the lowest temperature, and work our way up to the things with the highest baking temps. That way we never have to worry about the oven needing to cool off between batches.

4. Time Travel
Earlier, this year I learned that most drop cookies can be made in advance. Simply create dough balls (or logs) and freeze. Then simply bake (or unthaw and drop onto cookie sheets then bake) and enjoy. This is a fantastic way to spread out the prep work and allows you to maximize your time in the kitchen.

5. Finishing Touches
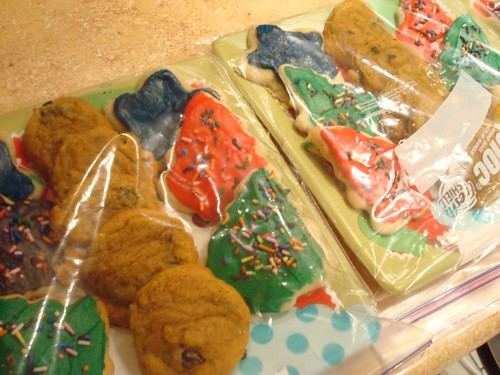
I began this cookie baking tradition at home with my mom and over the years we tried a variety of methods for gifting our creations. Hands down, the simplest, most transportation friendly method is to place the cookies on a plate and slide into a gallon ziploc bag. Add a cute tag or label and you are done. The cookies will stay fresh and moist, they travel safely and stack well, and the recipient does not end up with a random container. I've used glass plates in the past, but here in the South people Freak Out thinking you are handing out your dishes. So cute, seasonal paper plates it is!

Over the next few days, I'll show how we put each of these into practice this year.
Related Posts Plugin for WordPress, Blogger...