
Step 2. Have fabulously creative husband (and mother) come up with the brilliant idea (or read about their amazing idea here).

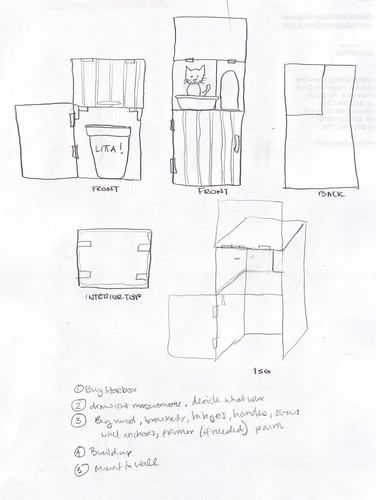
Step 3. Draw up a plan heavy on the cute, light on the details. Blog about it.
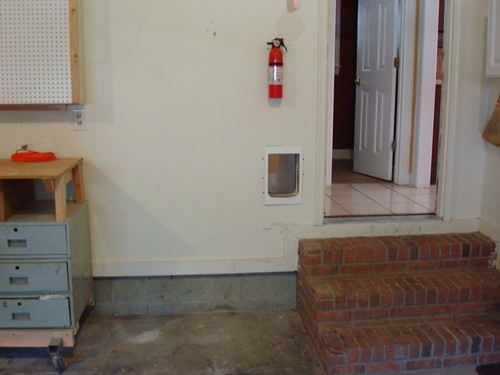
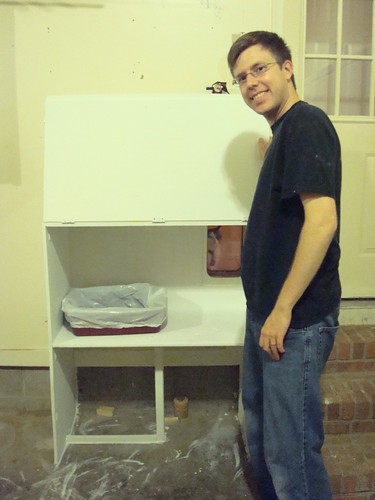
Step 4. Purchase the litter box you want to use. Find scrap wood in the garage. (Or buy some. Ideally you would want 1/4" thick mdf.) Beg, borrow, or steal some form of saw, a drill, and some C clamps. (We used a jig saw, you could use a skill saw if you are feeling brave or a hand saw if you are feeling particularly patient.) Purchase beadboard. Pick out an awesome handle and latches for the sides. Buy a fair amount of wood glue (we used two of the regular sized bottles), plenty of small 1/8" long wood screws, a couple tubes of caulk, a caulking gun, primer, and paint. Save your receipt for a blog post like this. Promptly forget where you put it. Grumble that the cats will have the most expensive litter box in the city.
Step 5. Break out your handy dandy tape measure and measure where you want your boards to fit and how. If you have a yard stick, this is a great way to get relatively straight cuts. Remember to include the little things (like your door needs to be wide enough to cover the opening AND the two sides walls). Test fit your pieces as you go. We got fancy and match cut the wood to the molding on the walls. If this is too much, you can always build it flat and just butt it up against the wall, just make sure it is well secured.

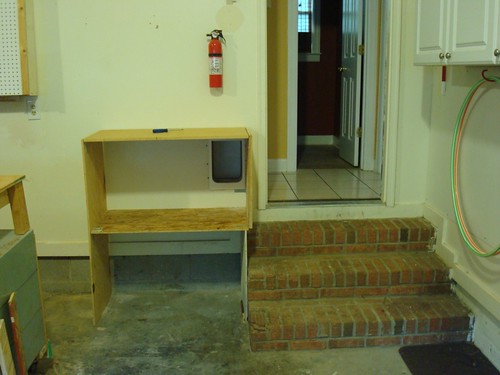
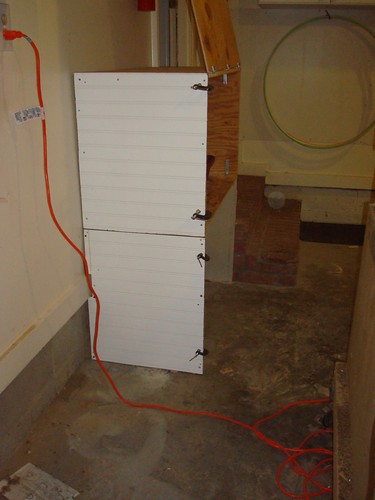
Step 6. Join your pieces. You could use pieces of wood and long nails but we used L brackets and corner braces. We had bunches of L brackets on hand and the corner braces were just easy peasy. If you are going into drywall, you will need drywall anchors to secure those screws so they can support the weight. Keep adding boards until you have the box built up. Now is the time to add a support if you feel you need one. We cobbled ours together of thin pieces of wood and more L brackets.
Step 7. Attach your beadboard to your door piece, attach hinges to box and then to door. You will want to drill the holes for your handle before you attach it, but don't install the handle yet, you need to paint!
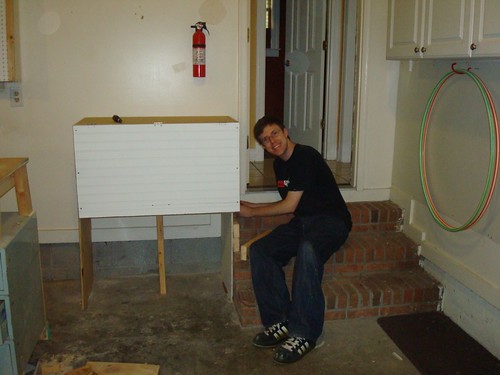
Step 8. Attach your bead board using generous amounts of wood glue and screws. This will hide the drill holes from the anchor screws (if any) and make everything look beautiful and super finished. Clamp the beadboard in place while it dries so it will dry flat. Don't worry about any small gaps, you can fill that in with caulk later.
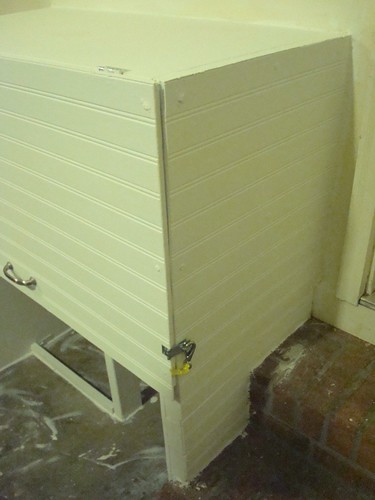
Step 9. Caulk to fill all the gaps, crevacies, uneveness against the wall, screw heads and random holes. Prime all unfinished wood. (Our beadboard came primed!) Paint everything.
Step 10. Attach latches to prevent kitty escape.
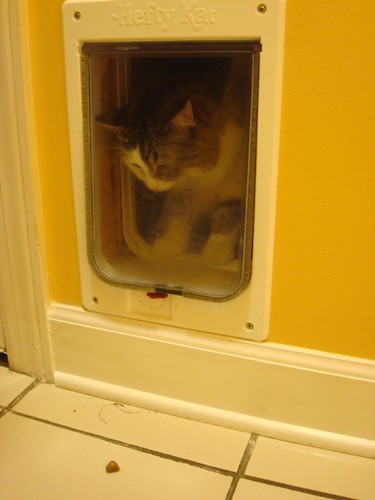
Step 11. Attempt to teach cats to use kitty door and the new litter box.
That is so amazingly awesome! Isn't being an engineer great? ;)
ReplyDeleteI love the cat peeking in at Step 9 :)
ReplyDeleteYou are so smart! I also love the kitty peeking picture.
ReplyDelete